In this month’s blog, we will be discussing how to export data and related filters.
We get a lot of inquiries about how to move data from one QuickBooks file to another. Luckily, we have a solution using Transaction Pro Exporter. https://www.rightworks.com/exporter-for-desktop With this powerful tool, data is exported in a format that allows you to use for reporting, importing into other applications or moving into another QuickBooks file.
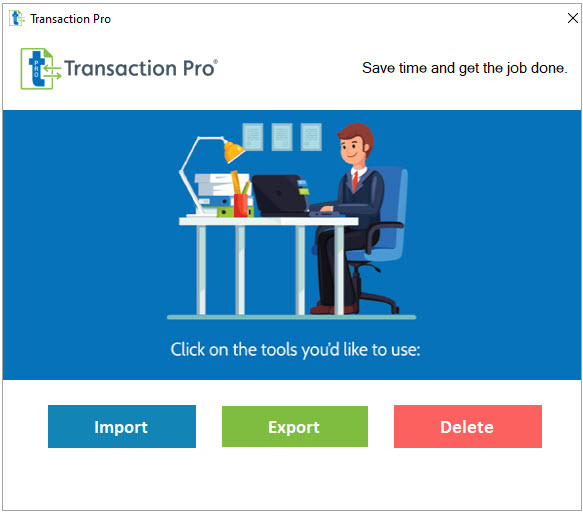
When you open Transaction Pro Exporter the following window will come up. To start, select the transaction type that will be selected to export.
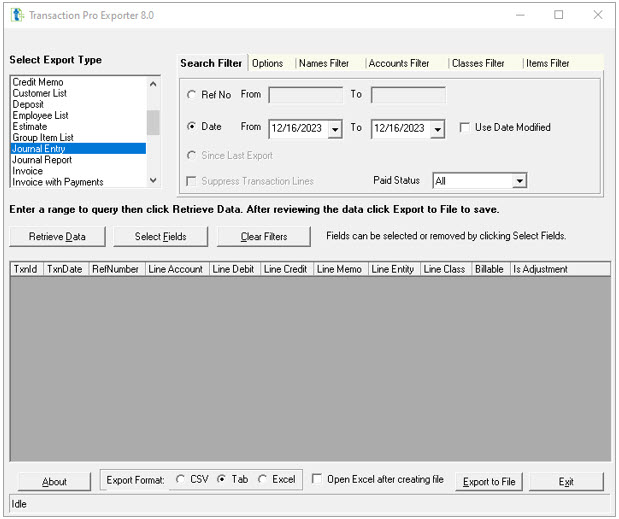
Once a transaction type is selected, there are various filters to further refine the data for exporting:
- Search Filter – this the main data selector and allows you to pick the “From / To” Reference number of the transaction
- Date Filter -Date Range
- There also is a Paid Status that allows you to select All, Paid or Unpaid to filter out transactions
At the bottom of the screen, the export format of CSV, TAB or Excel are noted for options. If you choose Excel, there is a parameter to auto open the excel file for review.
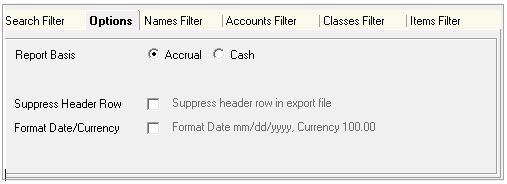
The next tab is the Options Tab. This tab indicates whether the report is Accrual or Cash. There is also an option to Suppress the header row, and formatting of the Date/Currency. Choosing this option to remove the header row can be helpful when you are connecting the data into other systems for reporting for further analysis.
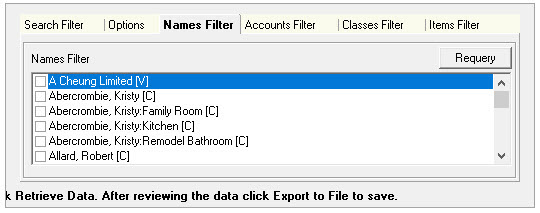
The Names Filter tab allows you to pick specific names to export transactions. This is very handy when you are trying to look for particular data points related to specific names. There is a REQUERY button listed which will repopulate the results.
Under the tabs Accounts Filter, Class Filter and Items Filter you can filter based on the criteria selected. For example, if you were only needing a certain set of data related to a Class exported, that can be selected on the Classes Filter tab. Keep in mind multiple items can be selected.
The Items Filter can be used for filtering data by items associated with the data. In the example below, we have filtered all invoices by a Service item called Repairs, which will provide an export of the invoices with the Repair items present. Use Items Filter for data analysis, as well as moving specific transactions from company to company.
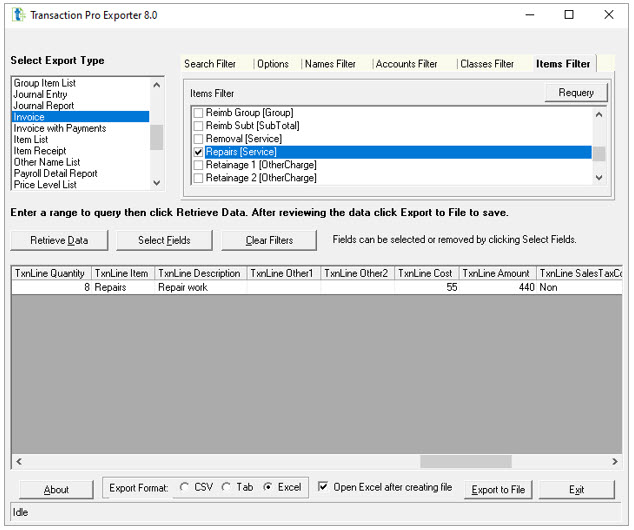
Once all parameters are set, the Retrieve Data button accesses the data and brings the results into the display window.
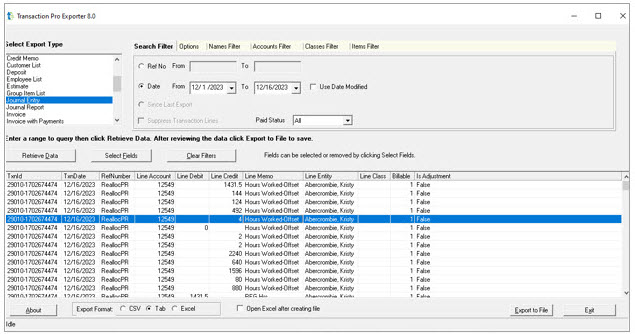
Data in this window can be resorted by column headers. You can also highlight selected rows and remove them from the display as needed.
The button Select Fields will show you the columns displayed and allow you to remove specific columns from the export file as needed.
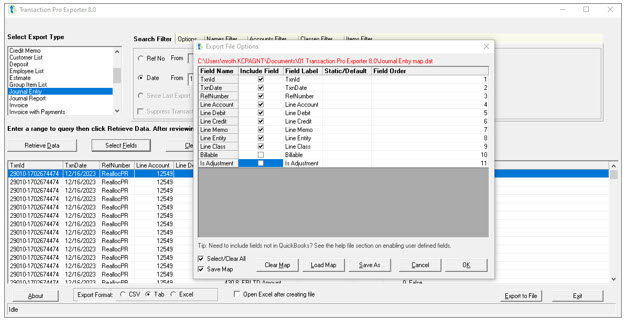
There could be a lot of fields that are not necessary for an export. For example, there are about 57 fields on an invoice export. You can remove those by unchecking the columns not needed. There also is an option to Clear all, which can help if there is a lot of fields you don’t need; just clear all and then pick the fields you do need exported. Once you have selected the fields you want, there is a handy feature to SAVE MAP. This lets you save your parameters for the next time you need them, working like the Mapping in the TPI Importer.
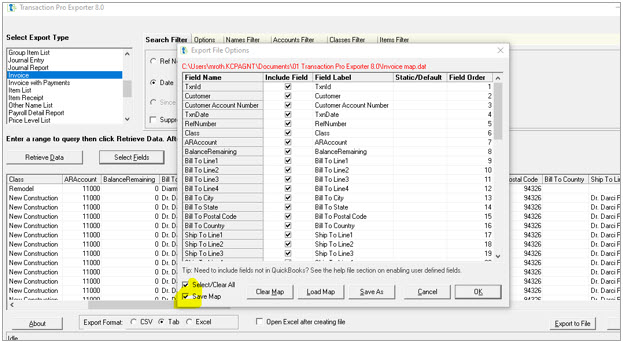
After all the parameters are selected, on the main screen, export your data to the file format selected.
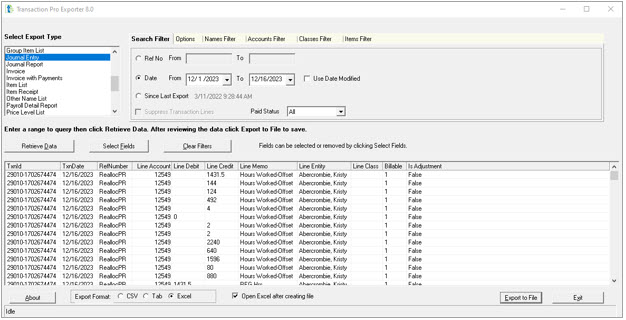
In this example, we selected Excel as the export file format.
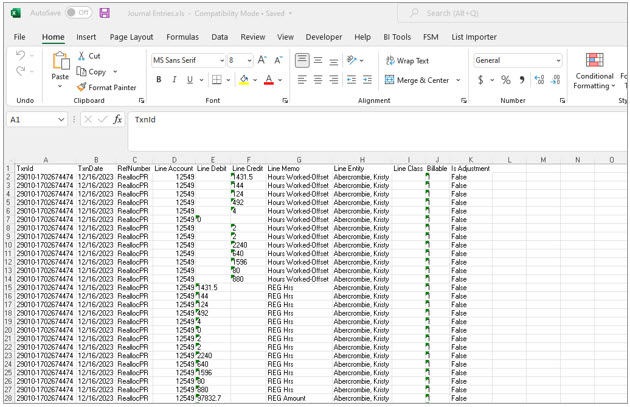
The data is now available for analysis or importing.
Using Transaction Pro Exporter is a power tool that can help you analyze data, or export transactions for importing using Transaction Pro Importer.


