Many people using QuickBooks (Desktop or Online) are long-time users, with years of data piling up in their company file. Item Lists can become unmanageable when there is a discontinued product line, inventory becomes obsolete, or a new vendor comes on board. The overabundance of Items can bog down their system, requiring more precious time to load a list or find the right item when preparing an invoice.
If this sounds familiar, then you will be pleased to know that using the Transaction Pro Deleter tool enables you to remove those items completely from your list to reduce the size of your item list. This tool will work in both QuickBooks Desktop and QuickBooks Online. Follow these steps, and you’ll be on your way to a clean Item list.
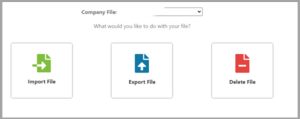
QuickBooks Online: 1. Log in to your Transaction Pro account and select Delete File.
2. Select the Data Filters.
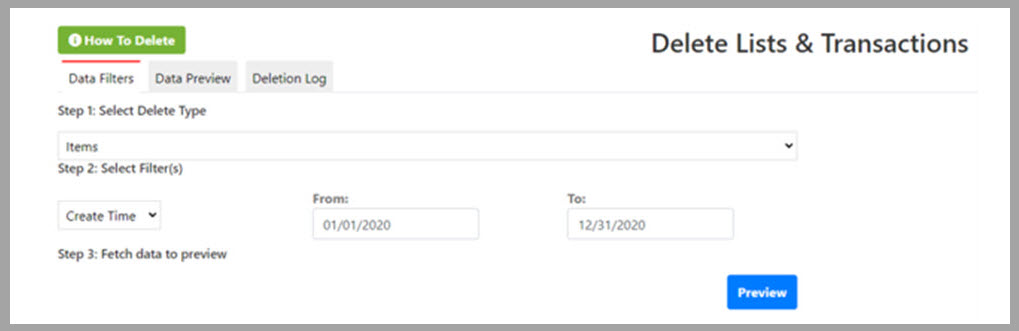
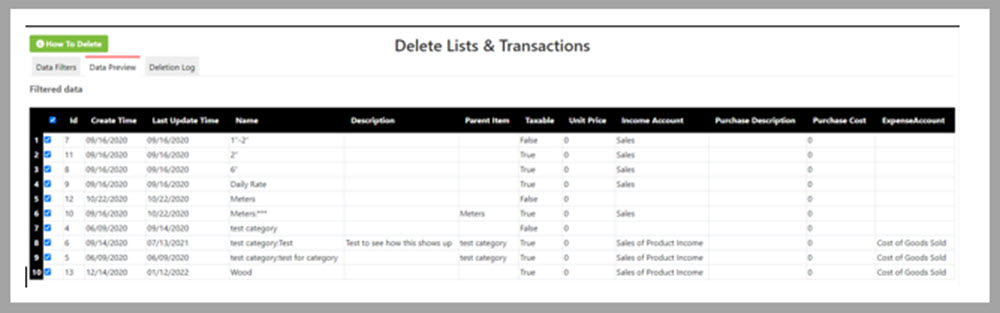
3. Select the Items from the list that you would like to delete. Click Delete Data in the lower right-hand corner.
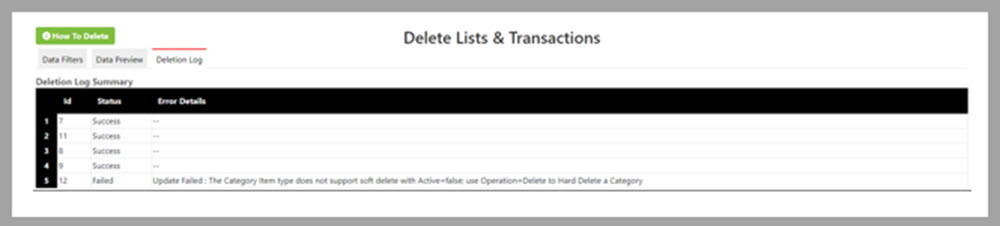
4. Review the Deletion Log for the status of Items selected for Deletion. If the status shows failed, Error Details provide information and the next steps for deletion.
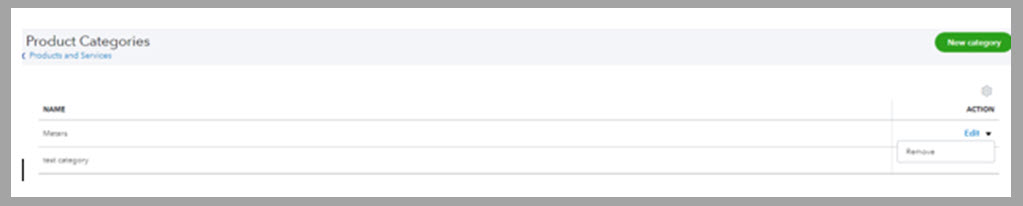
NOTE: QuickBooks Online (QBO) will not fully delete the categories through Transaction Pro. You will run the Deleter tool, and then you will manually go into your QBO file > Sales > Products & Services > More > Product Categories > Arrow next to Edit > Remove
5. You will see a window confirming your desire to delete. Answer OK > Key in “DELETE” in the field and click Delete.

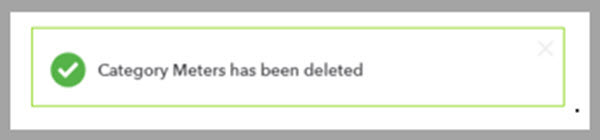
6. A window appears confirming the deletion of the Categories.
QuickBooks Desktop: 1. Open the QuickBooks file you need to clean up. 2. Open Transaction Pro and select Delete.
3. When prompted to trust this software, select “Prompt each time” and click Continue.
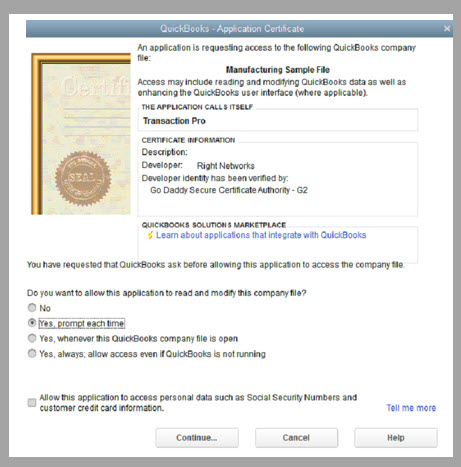
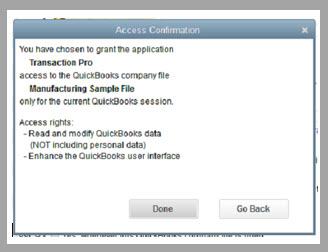
4. Confirm the Access of TPI to the Company file.
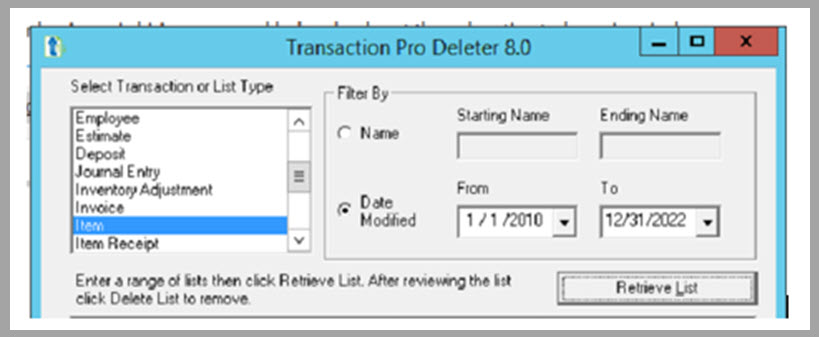
5. Select “Item” from the list. Then select how to “Filter By” and click “Retrieve List.”
6. Once the list appears similar to the image below, you can delete by the row or by the full list. Highlight desired items and click Delete Rows. If you want to delete the complete list, select Delete List.
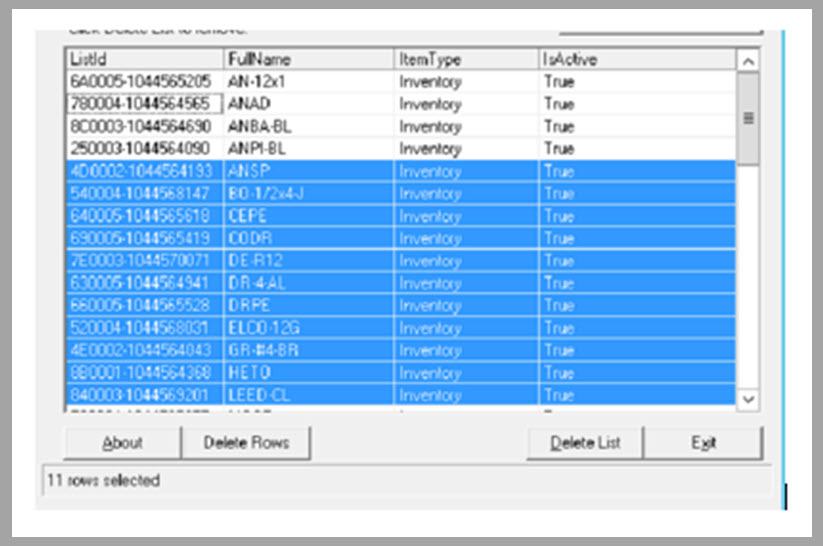
**NOTE** You can hold Shift/CTRL and click on rows to highlight multiple items in the list.
Once you click “Delete Rows” and/or “Delete List,” your items are removed from your QuickBooks file. When finished, click “Exit.”
After using the tool, you will have reduced the size of the list and will allow QuickBooks to run smoother and slightly faster. You will also prevent the potential of human error – by selecting a product for sale that you no longer carry or desire to sell.