Year-end is coming and a lot of businesses will be counting inventory to make any needed year-end corrections. The basics of the import for year-end counts are to get an accurate count of inventory items as of a specific date.
If your handheld can export data to CSV or Text, TPI can easily read the data and bring in an inventory adjustment transaction in QuickBooks. Using your favorite file editor, review the import file to see what data fields to import are available. Excel is a good choice to use as an editor, but you could use Notepad or other text editor to review the import file.

After any changes are made to the file, open Transaction Pro and locate your file to import.
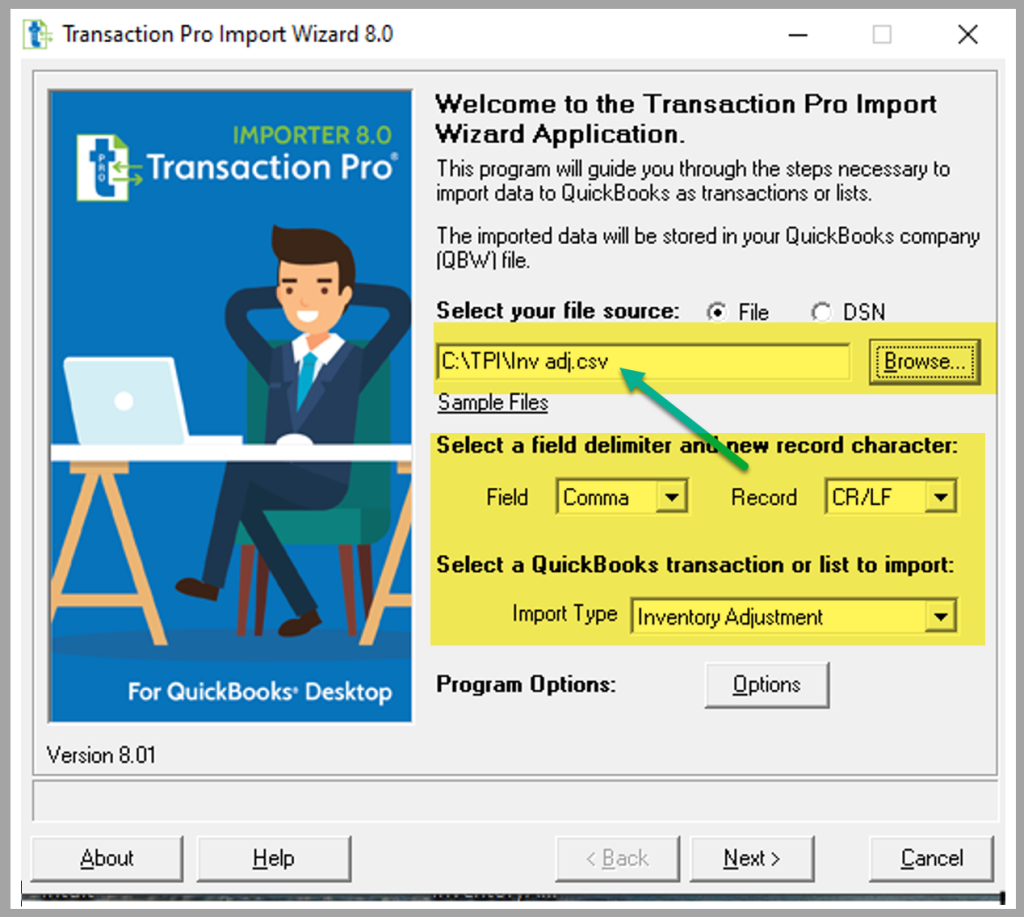
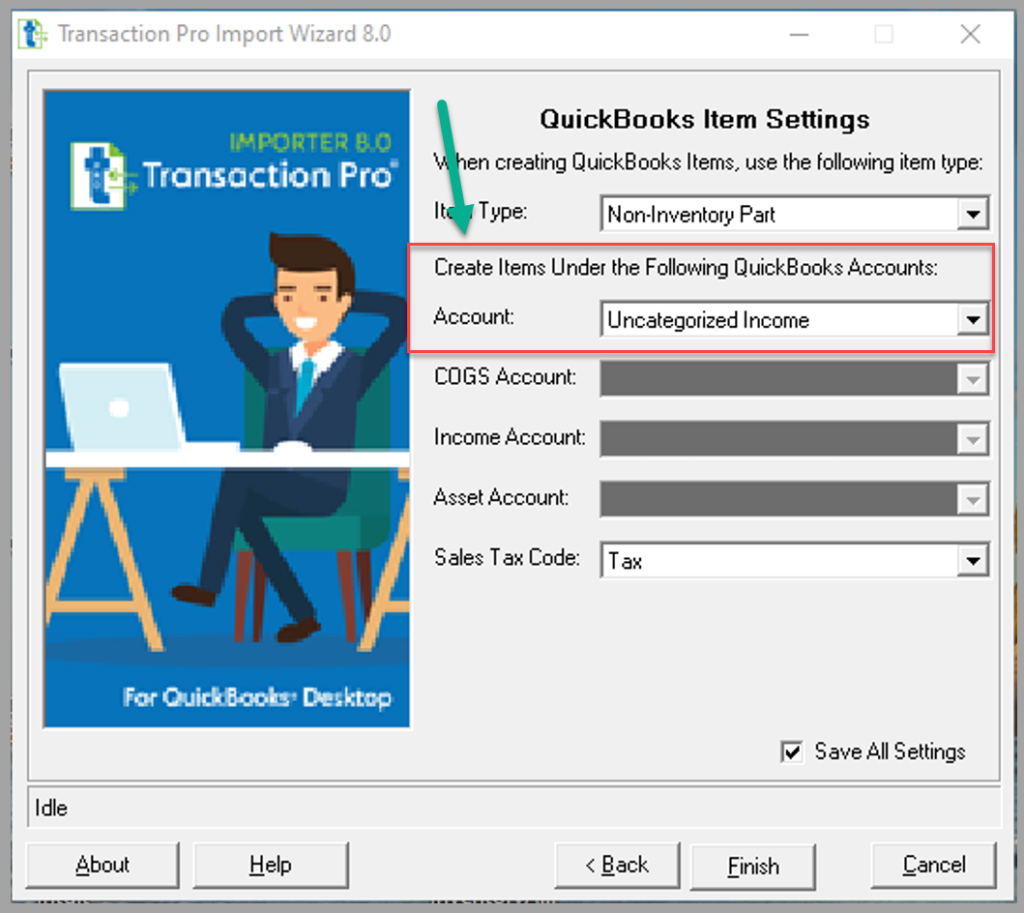
In Transaction Pro review your default settings to confirm how you want Transaction Pro to handle the import file and new items that may be present.
To get to your preferences, click the Options button on the welcome page
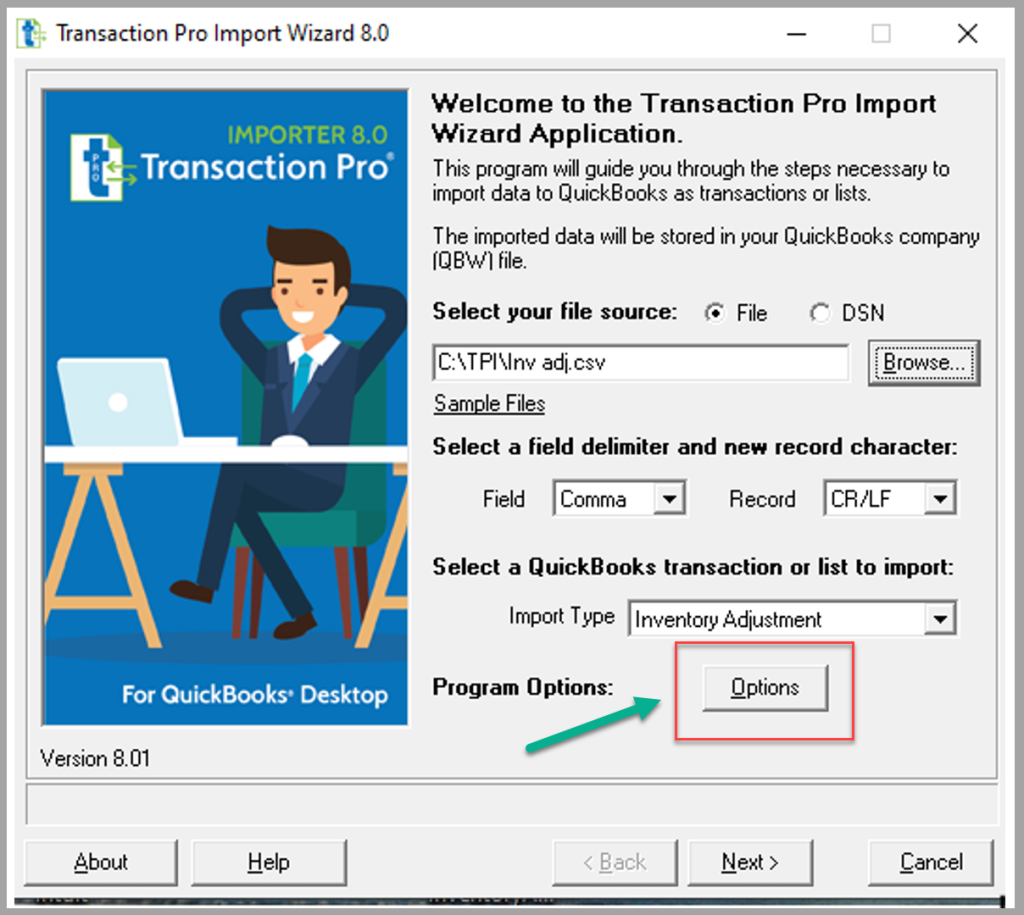
Before we move on, it is a good time to review the “Program Options: Options“ button to see your preferences that are setup for Transaction Pro.
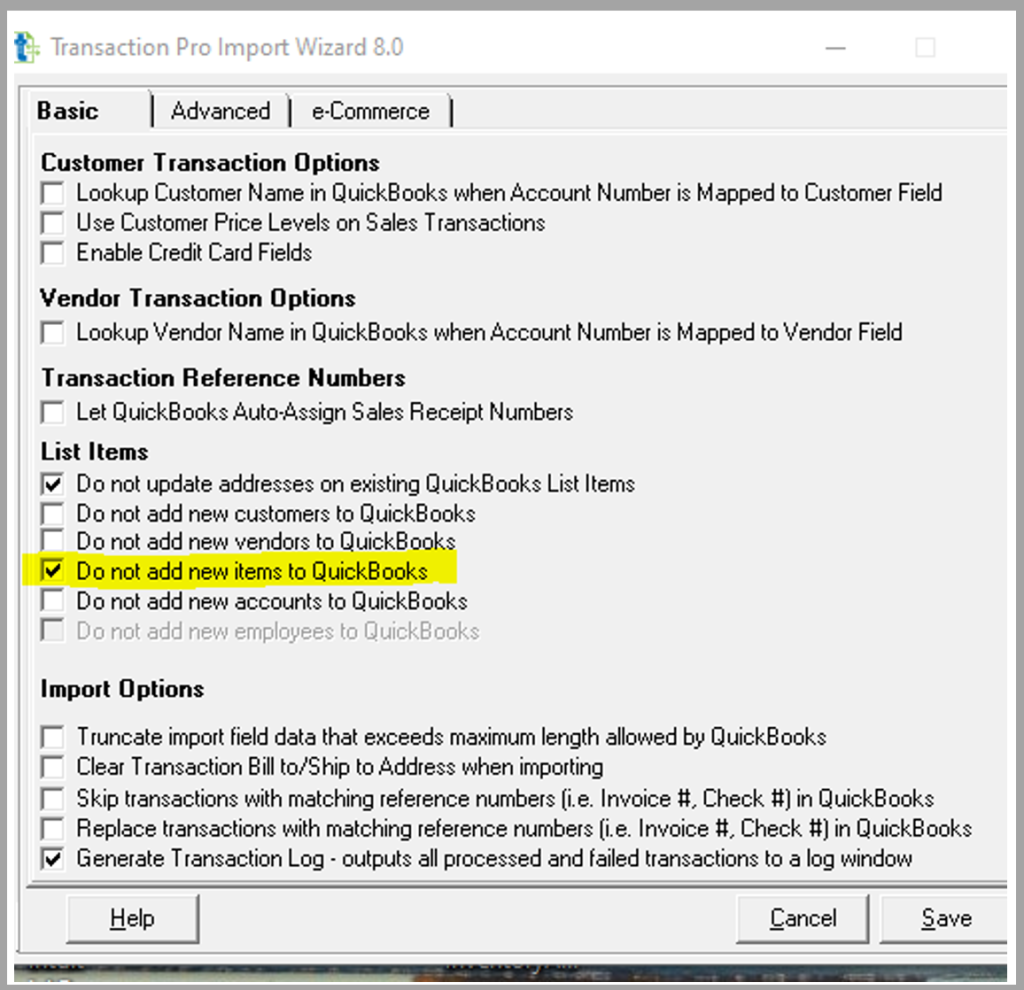
Click Options from the main screen, then on the Basic Tab, review your List Items settings. If you do not want Transaction Pro to Auto Create items that are not present in the QuickBooks Items list, please select the option “Do not add new items to QuickBooks”. This is handy to prevent misspellings or new items from being created in QuickBooks Inventory automatically.
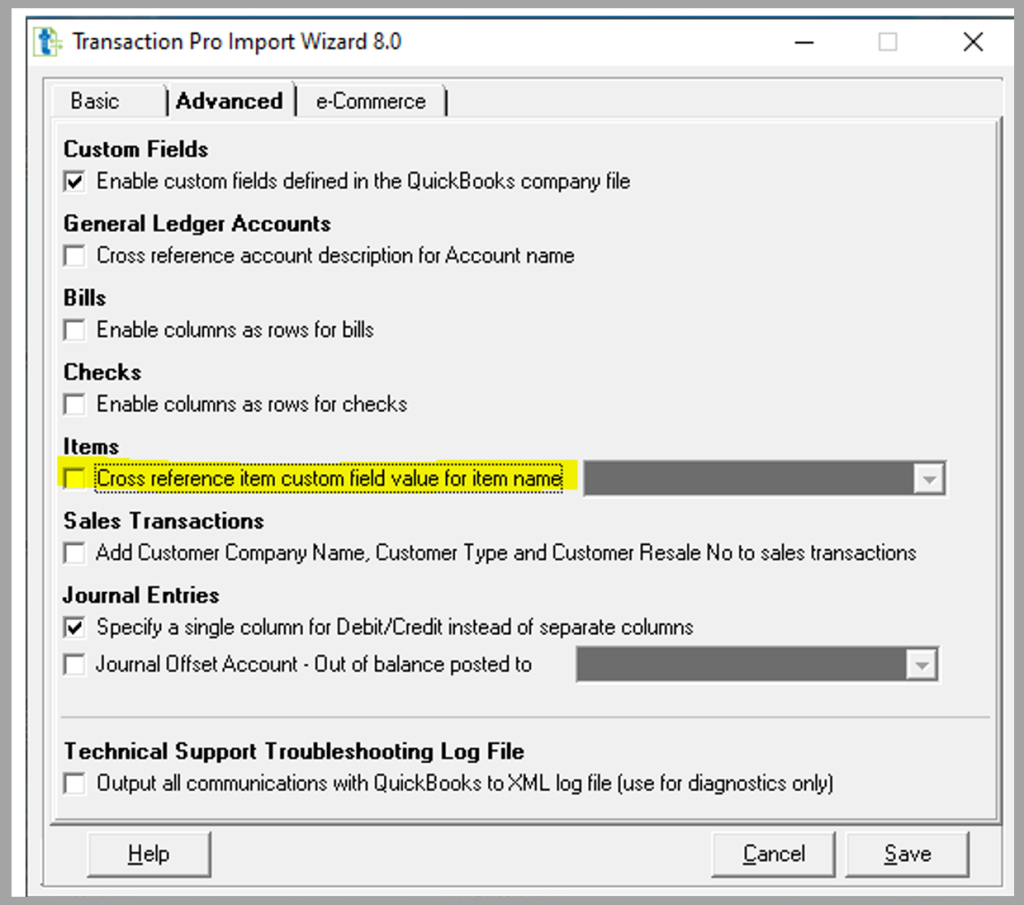
On the Advanced Tab, review the preference for how Items are to be found. There is an option to use a custom field value for the item name. This can be used to cross reference an item name if the handheld sees a different name, like a bar code number.
In Transaction Pro the following are the fields available for an inventory import:

If your data contains headers, match up the exact names and Transaction Pro will auto match the columns by clicking the field match button. The basics would be Item number and Quantity counted.
The fields in Red are required fields for imports. If those are not present in the file, we can enter in a Static Value. If data is present in the Import File Column, click the drop down and select blank, then the Static Value/Formula Field is available. Enter in the Reference number desired in the field.
The Account number and Transaction Date field can also be auto populated if they are not present in the export file.
In my example, the fields for RefNumber, Account and Transaction Date are set by using the static value.
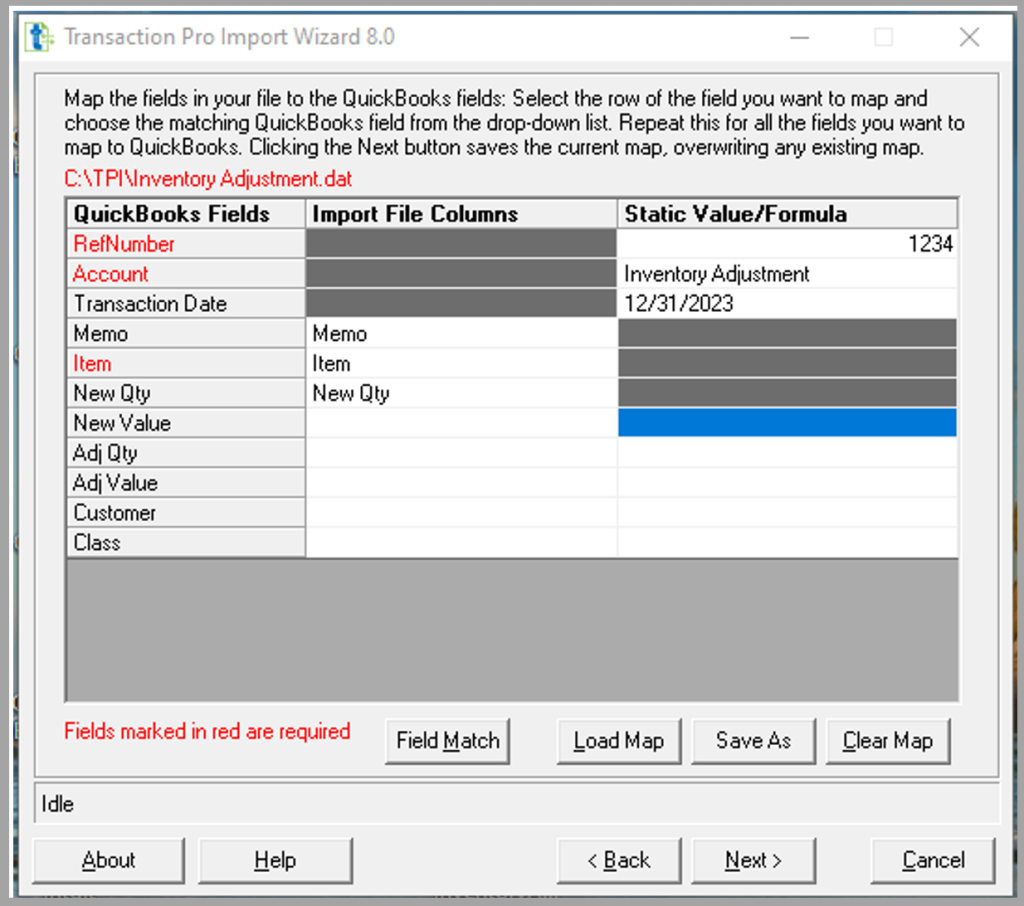
The memo field can be used to map to your file if the file has a description which is helpful to describe information about each item counted.
The Item field is a required field and should map to your inventory item number in the export file. If the heading on that column says “Item” then it will auto match.
When you are doing a year-end inventory count, the NEW QTY field is used for your new counted quantity, map the field to the “New QTY” field. Once imported, this will be the new quantity of the item.
The fields of New Value, Adj Qty, Adj Value would not be necessary for a year-end import of quantity. These fields would have other uses for an inventory adjustment import.
The Customer could be used if you wanted to assign a customer/job to the inventory count.
The Class field is optional and would be used to assign the inventory adjustment value to a specific class.
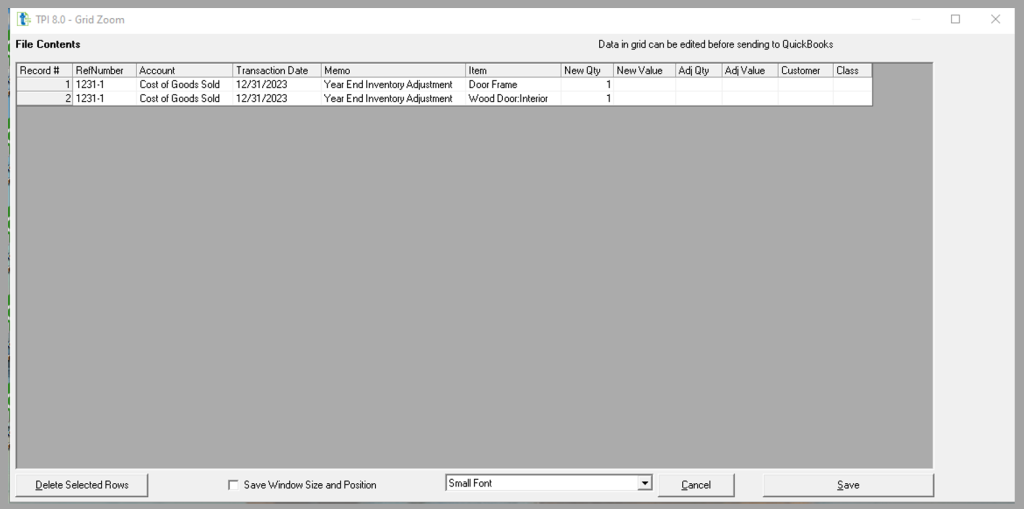
On the next screen, the import file should be present, and any errors may be noted.
If you adjusted your preferences to allow for the creation of new items, mentioned earlier in this blog, these settings will create the new items.
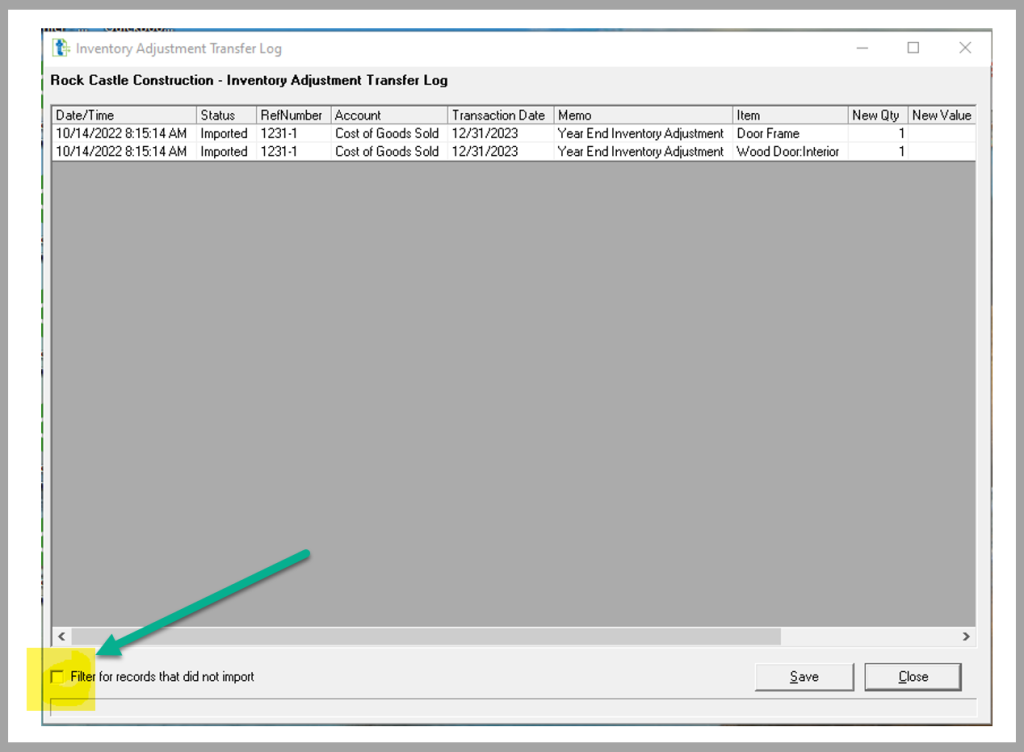
When the process is complete, the log file will appear. If you don’t see a log, then check your preferences to be sure that the log file setting is turned on. The log file will show the items imported and you can filter for those items that may not have imported.
Once imported, open QuickBooks and review the inventory adjustment imported. In our example, we imported a new quantity of 1 for the Door Fame Item. The resulting entry in QuickBooks was to reduce the quantity count by 20 and it created the necessary accounting entry.
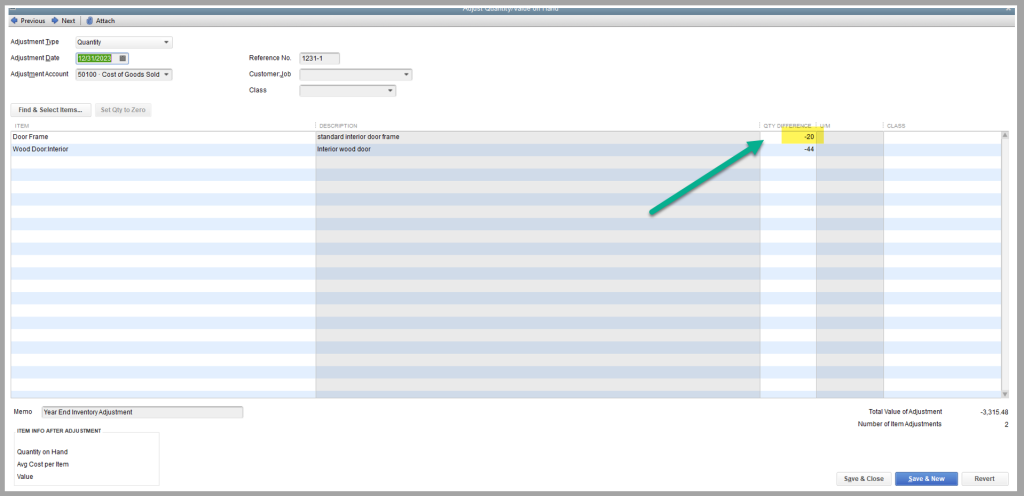
In QuickBooks you can also click the adjustment type drop down to see the value of the entry by selecting Quantity and Total Value.

You can make necessary changes from inside of QuickBooks as needed.
These are a few ways Transaction Pro Importer can help with inventory counts and help make the year-end process of adjusting inventory easier and quicker!