Transaction Pro Importer for QuickBooks Desktop provides a series of command line codes. These codes change how Transaction Pro Importer works in good, useful ways. Import options for QuickBooks Online are also addressed in this blog.
One command line we use at Peak Advisers use frequently is /Recpay3. Let’s understand why. Some clients have large Oracle databases that collect patient data regarding programs, treatments, patient fees, etc. However, these Oracle installs do not provide a friendly way to track customer invoices and payments. The information is in Oracle, but customer-facing users and the customers themselves needed a more friendly means of tracking customer transactions.
So, Transaction Pro Importer was used to import customer invoices into QuickBooks Desktop. This was straightforward and worked flawlessly. However, the receipt of payments was a different matter.
Oracle works in a way that prevents it from including the customer’s name in an export of payments received. There was a secondary problem that naming conventions in Oracle differed from QuickBooks Desktop, so even if the customer’s name could somehow be added, it would require Excel work to match the name to the name as it appears in QuickBooks Desktop.
So, the customer name could not be used; the invoice number had to be used as the index. This presents the following problem in Transaction Pro Importer, shown below.
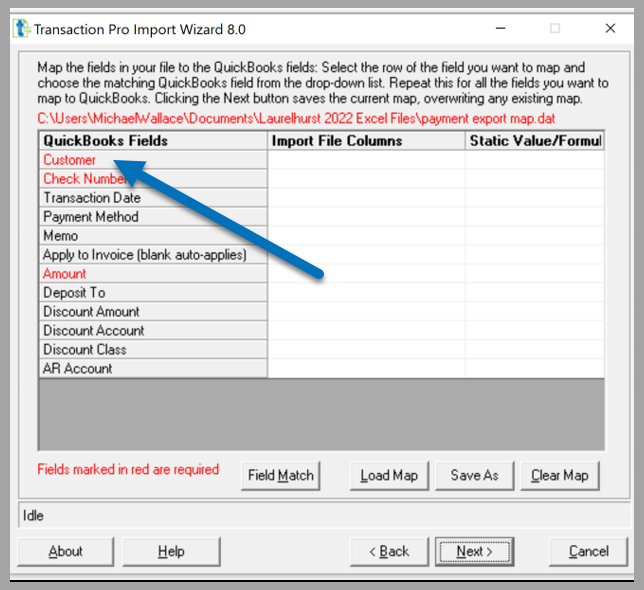
See the problem? Customer is a required field, and the customer name is not available. To resolve this, Peak Advisers added /Recpay3 to the command line. To get to the command line, you right-click your TPI icon, select properties, select a shortcut, and then add /Recpay3.
The standard command line in Transaction Pro is this: “C:Program Files (x86)Transaction ProTransaction Pro.exe”. Adding /Recpay3 changes the command line to this:
“C:Program Files (x86)Transaction ProTransaction Pro.exe” /Recpay3 [Note: There is a space between the “ and the /. This is required.]
You then click Apply, click OK and close Transaction Pro and restart.
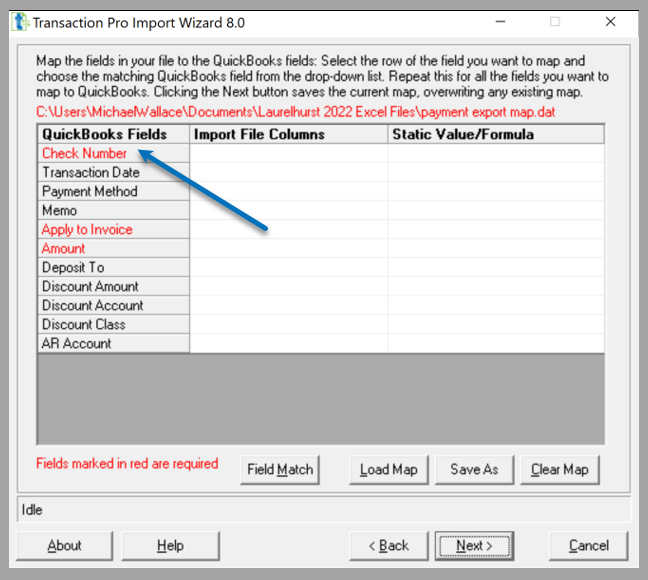
When you import the data, the mapping screen looks like the image below. Notice that the Customer name is no longer a required field.
At Import Command Lines, there are over 40 different command line options for Transaction Pro Importer. At Exporter Command Line Codes, there is a list of Transaction Pro Exporter Commands.
Peak Advisers uses command lines on many of the imports and exports where we are asked to assist in exploring them. Enjoy them. Enable them.
Does this work for QuickBooks Online?
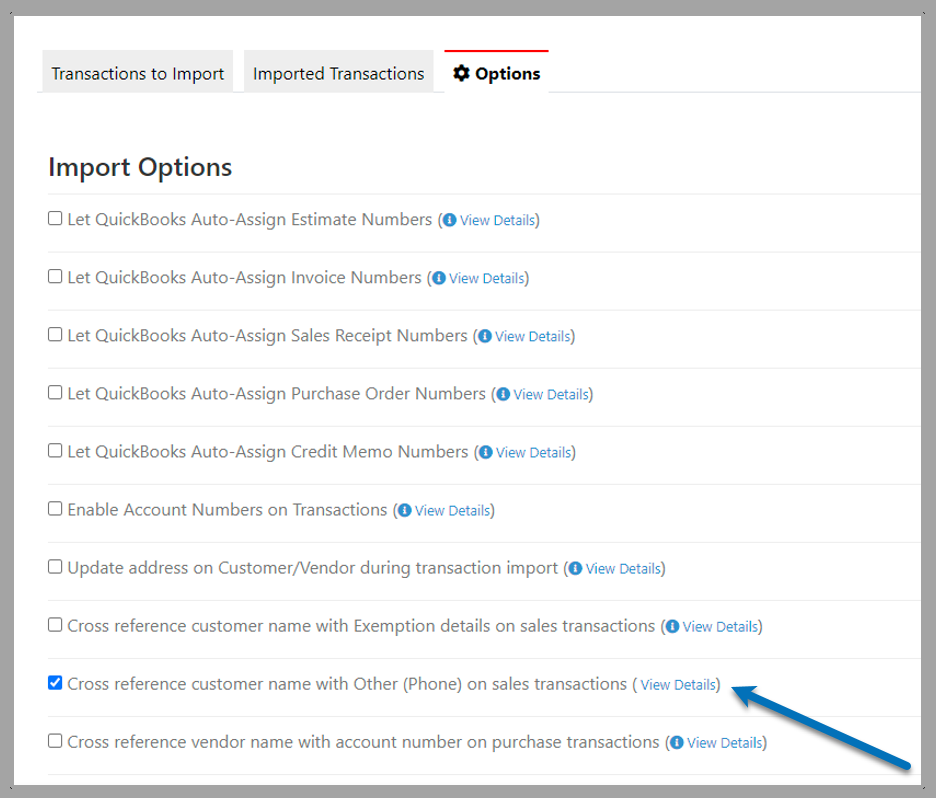
The quick answer is no. There are options available to you when importing into QuickBooks Online, but these options are more akin to the options that exist in Transaction Pro Importer for QuickBooks Desktop.
This isn’t a bad thing. The fact of the matter is the flexibility Transaction Pro Importer provides for QuickBooks Desktop isn’t needed with Transaction Pro for QuickBooks Online.
Check out the table below for import options available in Transaction Pro Importer for QuickBooks Online.