
Transaction Pro Online makes it easy to link multiple QuickBooks Online companies. However, to make use of Transaction Pro Online’s easy compatibility, we must make sure that we set up our QuickBooks account logins correctly.
Subscriptions that Support Multiple Companies
To link multiple companies with Transaction Pro, first be sure that you have the right subscription. If you have the Essentials subscription, you can upgrade by logging into your Transaction Pro Online account. Inside the Admin Portal under “Actions” select the “Manage” drop-down and select “Modify Subscription.” From there you can select the subscription (Growth, Premium, or Firms) that fits your needs.
Having the Right Setup with your QuickBooks Login
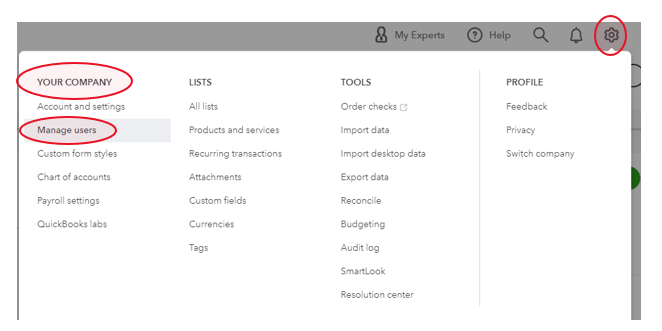
Next, we want to make sure we have the right setup with our QuickBooks login. For every company that you want to link into your Transaction Pro Online Admin Portal, you will need to be set up as an administrator in QuickBooks Online. To do so, login into the QuickBooks Online account or have the current admin login to the account, select the icon in the top right corner of QuickBooks, and under “Your Company” select “Manage Users.”
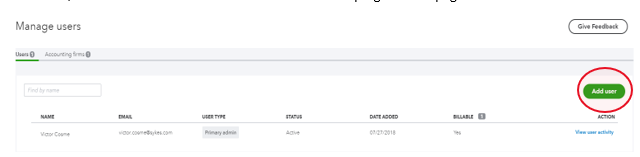
After that, select the “Add user” button located on the top right of the page.
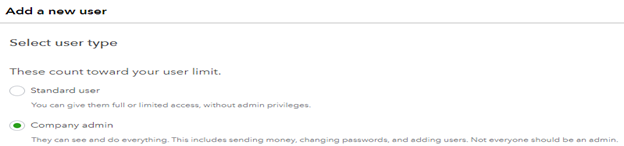
Finally, select “Company Admin” then enter the name of the user and email and select “save.”
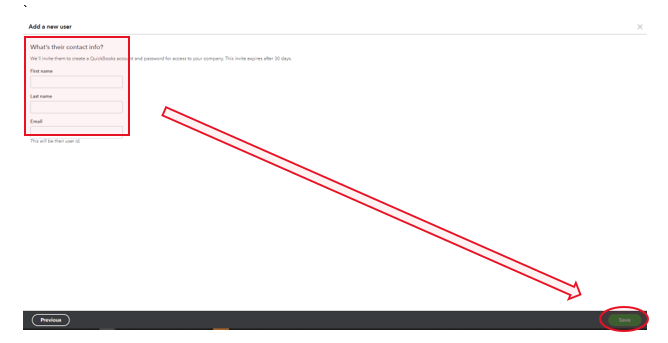
Now all that’s left is to find the email invitation from Intuit and accept it using the same email address/username that the other companies are linked to.
Link QuickBooks Online Accounts to Transaction Pro Online
Now that QuickBooks logins are all set up, you can link the accounts to Transaction Pro Online. First, login into Transaction Pro Online. Under “Actions” select the “Manage” drop-down menu and select “Edit Companies and Users” to open the Admin Portal.

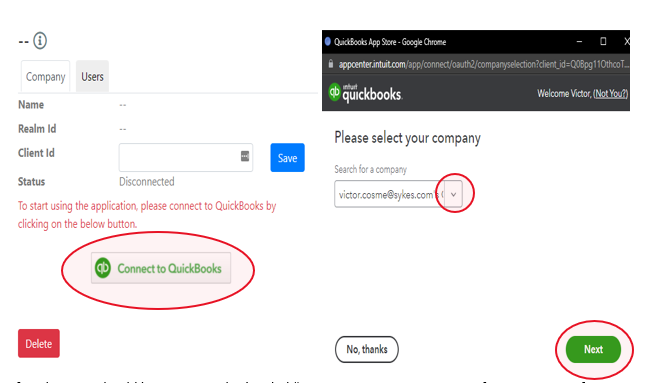
Once in the Admin Portal select the “Add Company” button on the top right of the page.

Next, select “Connect to QuickBooks” and it should populate an Intuit pop-up. From there, open the drop-down menu under “Search for a company” and select the company you want to link, then select “next.”
(You can only select one company at a time. If you have multiple companies to link, you will have to go through this process again for each company.)
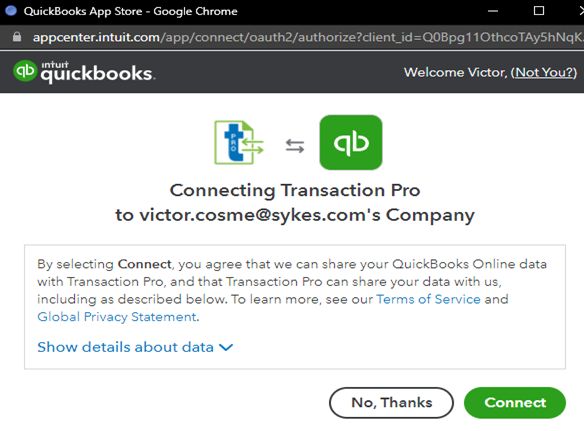
Next, you should be on a page that’s titled “Connecting Transaction Pro to [Company Name] Company.” Select the “Connect” button and that will start the link process between Transaction Pro and QuickBooks Online.
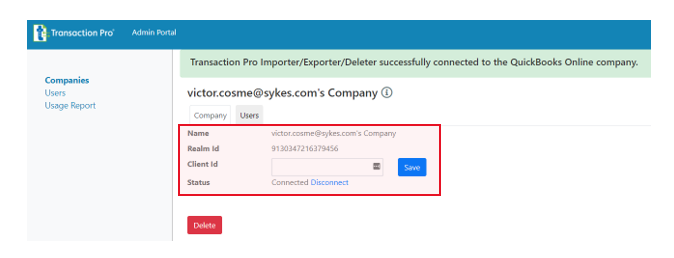
Last but not least, when the link is complete, it will take you back to the Admin Portal and a green confirmation bubble should appear saying “Transaction Pro Successfully Connect to the QuickBooks Online Company.” You can also double-check if the file is connected by seeing if the Company Name is listed next to “Name.” Also there is a 16-20 digit number next to “Realm ID” and next to “Status” it should say “Connected.”
Finally, click “Companies” on the left-hand side of the page and you should see the company that was just added under “Available Companies.” Repeat this process to add another company or go back to the main page to start using Transaction Pro.
If you have questions, you can connect with our Customer Support Team by leaving a message in the chat on our website, www.transactionpro.com, or emailing support@transactionpro.com.