Transaction Pro
Make your QuickBooks® transactions effortless
Import, export, and delete QuickBooks data faster with Rightworks Transaction Pro. In just a few clicks, you can seamlessly transfer between QuickBooks, Excel, and CSV files without manual errors.
See why business owners trust Transaction Pro
“Transaction Pro allowed us to automatically import [and export] data from popular platforms such as Shopify and Amazon to QuickBooks Desktop, and now, QuickBooks Online.”
-Dan Mason, Owner, Business Innovation Technologies Inc.
Trusted by growing businesses, Transaction Pro saves time, reduces errors, and simplifies bookkeeping.
Transaction Pro for QuickBooks Desktop or QuickBooks Online
Whether you do bookkeeping locally with QuickBooks Desktop or in the cloud with QuickBooks Online, Transaction Pro helps you manage and move data faster and with fewer errors.
For QuickBooks Desktop users
Move local data at lightning speed
Quickly and accurately move your data in and out of QuickBooks Desktop with a download-ready version of Transaction Pro made for work on a local device. Looking for a version of Transaction Pro for QuickBooks Desktop that works in Rightworks’ cloud hosted environment? Book a call.
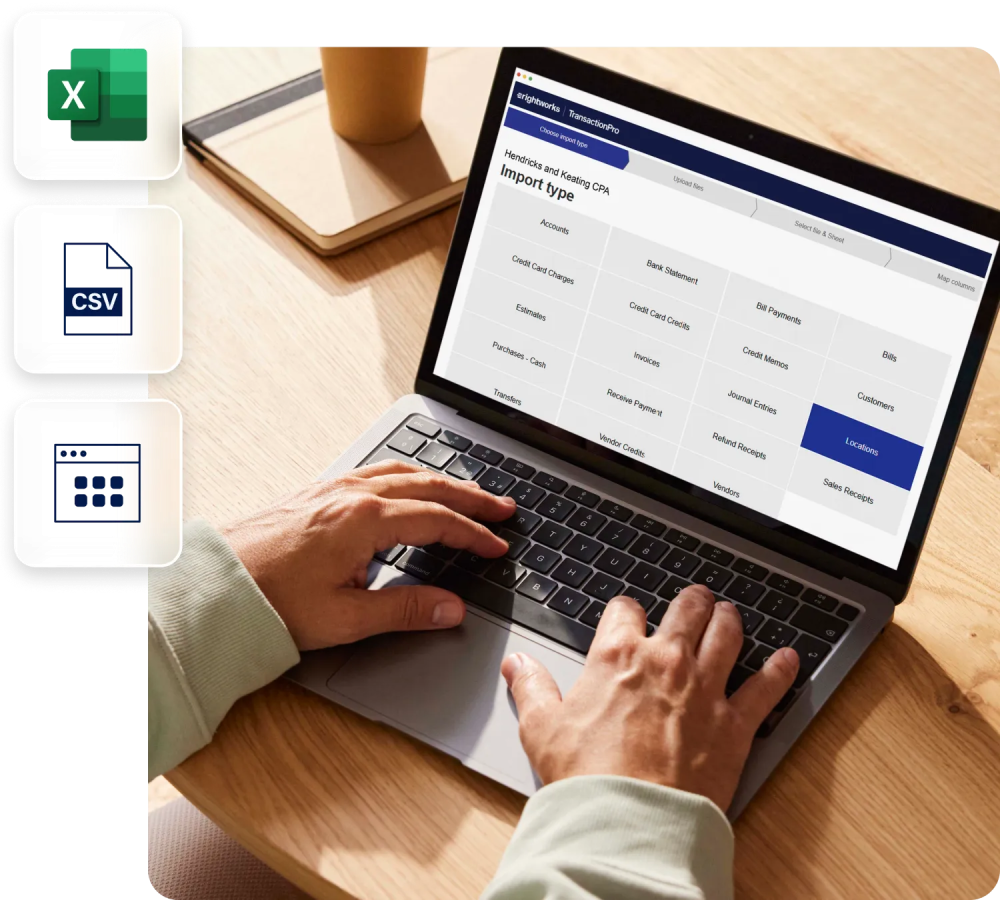
- Import over 20 transactions and list types, mapping your columns by fields
- Export only the columns you need and send to CSV, Excel, or other apps
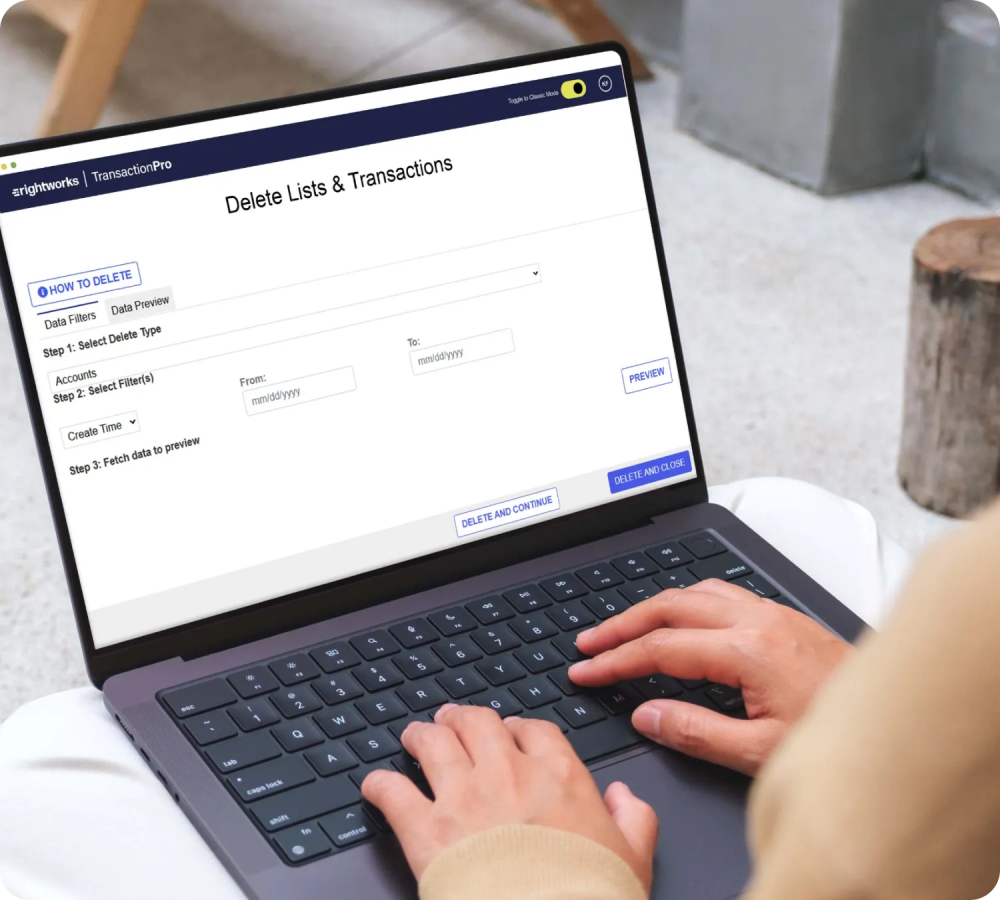
- Delete unwanted or old data in batches, without disrupting current data
For QuickBooks Online users
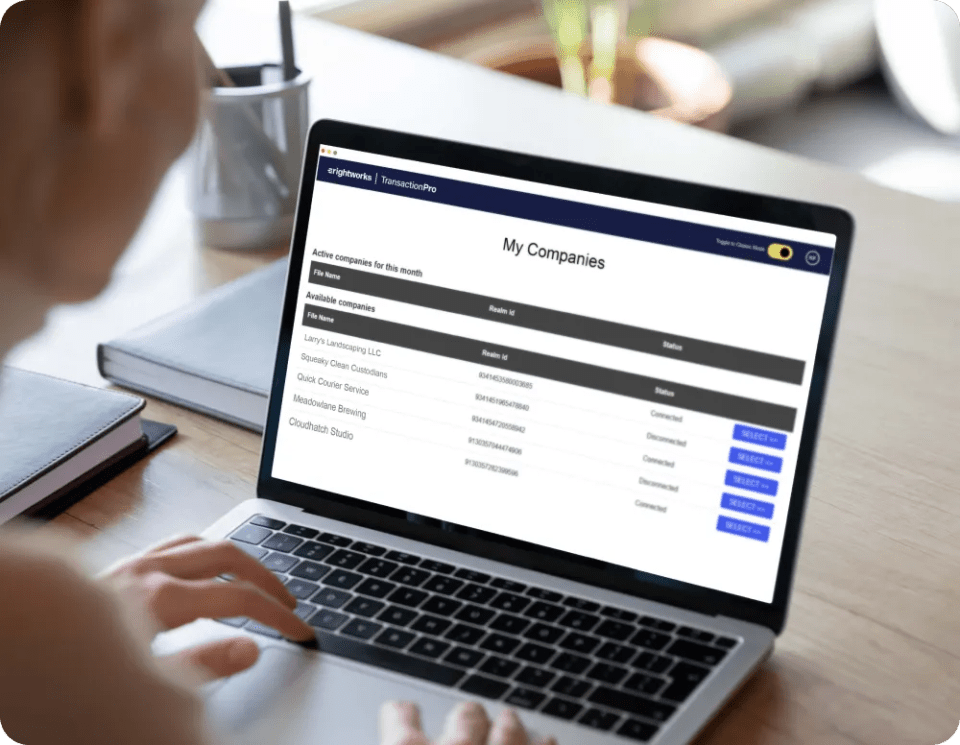
Manage data, companies, and users in one place
Simplify data transfers to and from QuickBooks Online. Our Admin Portal lets you manage multiple companies and users under one monthly or annual subscription.
- Import transactions and lists from any Excel or CSV file, and validate pre-import
- Export data for reporting, analysis, or to import into other apps
- Delete up to 20 transaction and list types, previewing queried data before deletion
- Manage all your clients and users from one centralized dashboard
- Create access levels to company files for optimal security and collaboration
Frequently Asked Questions
- Customer support is available Monday to Friday, from 9 AM to 9 PM ET.
- Live Chat: Simply click the chat icon in the lower right corner of your screen to get real-time support.
- Email Support: Email us at support@tpro.rightworks.com and we’ll respond swiftly.
- Phone Support: In need of immediate assistance? Dial 888-297-6172, option 2 and our skilled agents will be there for you.
- Visit our Support Center 24/7: Access helpful tutorials and FAQs to assist you at any time.
- QuickBooks Desktop: Version 8.0 of Transaction Pro works with all supported QuickBooks Desktop versions.
- QuickBooks Online: Simple Start, Essentials, Plus, Advanced
- Non-US: Transaction Pro works with all non-US versions of QuickBooks.
Yes, Transaction Pro Desktop and Transaction Pro Online both allow you to access multiple company files in one interface.
Excel, CSV, TXT, Quicken (QIF), Microsoft Money (OFX), Microsoft Access databases (MDB) and ODBC-compliant databases (such as SQL)
Excel and CSV
Yes, all Transaction Pro Desktop products can be installed and will function in a server environment. Transaction Pro for QuickBooks Desktop is made for work on a local device, not compatible in a cloud hosted environment. Click here to learn more.
Yes, the Admin Portal allows you to add users to one subscription—all with different levels of access.