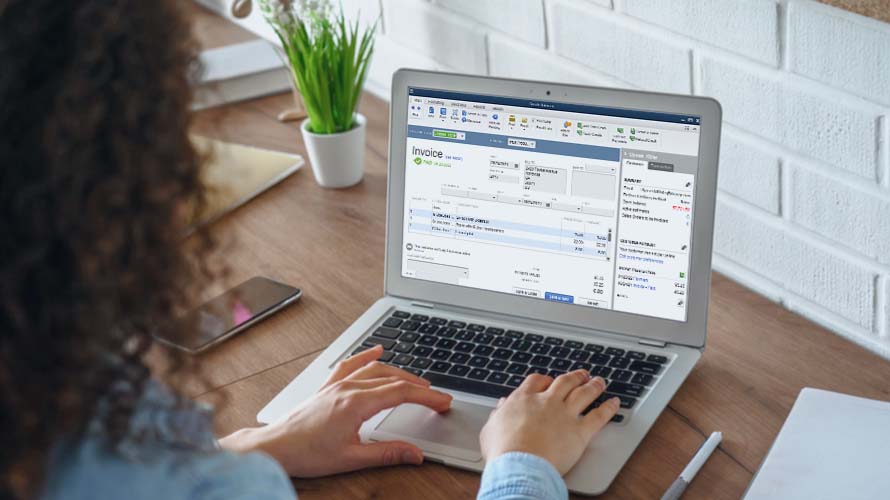
Imagine this: You’ve just finished creating invoices for all your clients in QuickBooks, but now you face the tedious task of exporting each one, opening your email client, composing individual messages, attaching the invoices, and sending them out one by one.
Sounds exhausting, right?
That’s exactly why setting up email directly within QuickBooks is a game-changer for your business workflow. With proper email integration, you can send invoices, reports, statements, and other financial documents with just a few clicks.
In this comprehensive guide, we’ll walk you through the exact steps to set up email in QuickBooks Desktop, troubleshoot common issues, and how to make the most of this time-saving feature.
Table of Contents
- Why Set Up Email in QuickBooks?
- Setting Up Outlook Email in QuickBooks
- Setting Up Webmail in QuickBooks
- Using QuickBooks Email Service
- How to Attach and Send Files from QuickBooks
- Testing Your Email Setup
- Viewing Sent Emails in QuickBooks
- Troubleshooting Email Issues
Why Set Up Email in QuickBooks?
Before diving into the technical setup, let’s talk about why integrating email with QuickBooks is worth your time:
- Save valuable time: Eliminate switching between applications and reduce manual steps.
- Maintain professionalism: Use consistent, branded email templates for all client communications.
- Improve record-keeping: Track exactly which financial documents you’ve sent and when.
- Reduce errors: Minimize the risk of sending the wrong document to the wrong client.
- Enhance security: Keep sensitive financial information protected within QuickBooks’ secure system.
Setting Up Outlook Email in QuickBooks
If Microsoft Outlook is your preferred email client, here’s how to connect it with QuickBooks:
Step 1: Gather Required Information
Before starting, make sure you have:
- Email username (typically your full email address)
- Email password
- Outlook
Step 2: Configure Outlook in QuickBooks
- Open QuickBooks Desktop.
- Go to the Edit menu.
- Select Preferences.
- Click on Send Forms in the left panel.
- Select the Company Preferences tab.
- Choose Outlook as your email option.
- Click OK to save your settings.
This integration works best when Outlook is already set up and functioning properly on your computer. QuickBooks essentially “borrows” your Outlook configuration to send emails.
Setting Up Webmail in QuickBooks
Don’t use Outlook? No problem. QuickBooks also supports popular webmail services like Gmail, Yahoo, and others:
Step 1: Verify Email Settings
First, gather these details from your webmail provider:
- Webmail server address (SMTP)
- Port settings
- Security requirements (SSL/TLS)
- Whether two-step verification needs to be enabled
For example, Gmail users would need:
- SMTP Server: smtp.gmail.com
- Port: 587
- Security: SSL/TLS enabled
Step 2: Add Webmail to QuickBooks
- Go to the Edit menu and select Preferences.
- Click on Send Forms, then choose the Company Preferences tab.
- Select the Web Mail option.
- Click Add to set up a new webmail account.
- Enter the following information:
- Email address
- Email provider (Gmail, Yahoo, etc.)
- SMTP server name
- Port number
- Check the box to enable SSL security (if required)
- Click OK to save your settings.
Step 3: Log In to Webmail
A login window will appear requesting your email credentials.
Enter your email address and password, and if prompted, grant QuickBooks permission to access your email account. Click OK to complete the setup
Pro tip: For Gmail users who have multifactor authentication enabled, you’ll need to create an “App Password” specifically for QuickBooks. Visit your Google Account settings to set this up.
Using QuickBooks Email Service
If you have an active Intuit service such as QuickBooks Payroll, you can use the built-in QuickBooks Email service:
- Go to the Edit menu.
- Select Preferences.
- Click on Send Forms.
- Choose the Company Preferences tab.
- Select QuickBooks Email.
- Enter your Intuit account credentials when prompted.
- Click OK to save your settings.
This option is particularly useful if you don’t want to connect your personal or business email account to QuickBooks.
Testing Your Email Setup
After completing your email configuration, it’s crucial to test the setup before sending important documents to clients or vendors:
- Create a test invoice or report.
- Click the Email button.
- Send the test document to yourself.
- Verify that the email arrives in your inbox with the correct attachment.
- Check that the formatting and content appear as expected.
If you encounter any errors during testing:
- Double-check your server settings and port numbers.
- Verify your login credentials.
- Ensure your email provider allows third-party application access.
How to Attach and Send Files from QuickBooks
One of the most valuable features of QuickBooks’ email integration is the ability to attach and send files directly from within the application. This is perfect for sending terms and conditions, contracts, or supporting documents along with your invoices.
Why Send Attachments Directly from QuickBooks?
- Improved workflow and productivity: No need to export and save files to your desktop only to re-upload them as email attachments. You save valuable minutes with each document you send.
- Protected and secured client files: Using QuickBooks’ Secure Webmail keeps your clients’ files confidential and secure, reducing unnecessary security risks that come with exporting files to your local desktop.
Step-by-Step Guide to Attaching and Sending Files
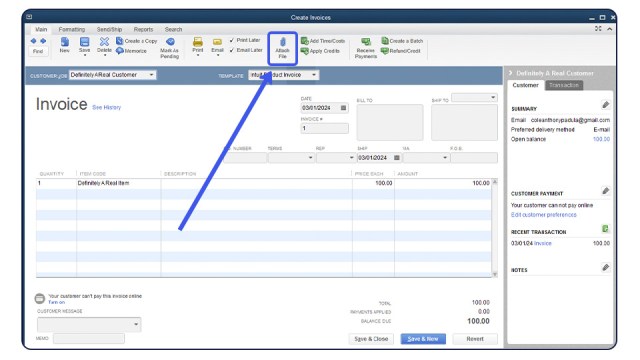
1. Open a transaction with attachments.
Start by opening any transaction (invoice, estimate, etc.) that already has an attachment. If there are no files attached yet, click Attach File to add them.
2. Add your files.
Select files from your computer or drag and drop them into the Attachments window. Click Done to save.

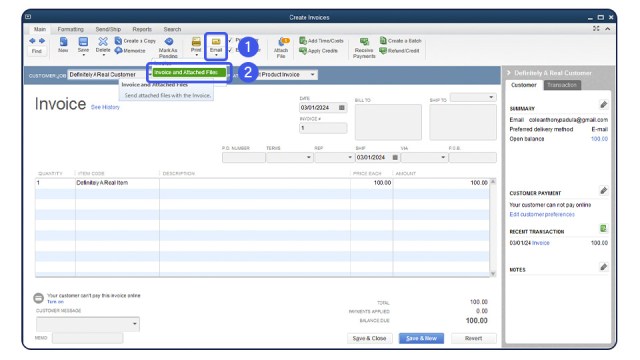
3. Send the email with attachments.
From the transaction window, select the Email icon. In the drop-down menu, select [Document] and Attached Files (for example, “Invoice and Attached Files”).
4. Review and send.
Confirm that the email template, body, and attachments are correct. Make any necessary adjustments to the message, then click Send.
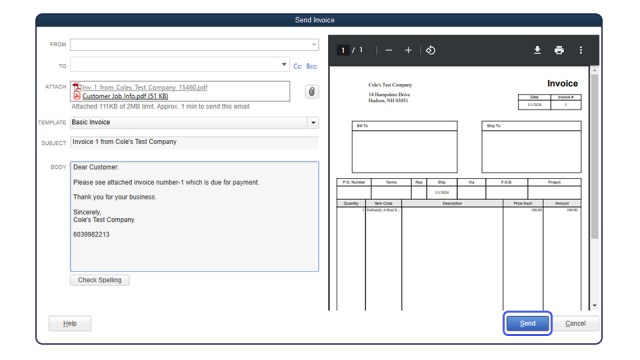
Pro Tip: All attachments are sent as standard PDF files, ensuring your recipients can easily open and view them without compatibility issues.
Viewing Sent Emails in QuickBooks
“Did those emails actually go through?”
We’ve all been there—the uneasy feeling that something important might have slipped through the cracks. What if your clients never received their invoices? What if vendors are left wondering where their payment requests went?
Thankfully, QuickBooks makes it easy to track your sent emails:
- Open QuickBooks Desktop.
- Navigate to the Customer Center or Vendor Center depending on who received the email.
- Locate and select the customer or vendor from the list.
- Click the Sent Email tab to view all emails sent to that contact.
- Review the email history, including timestamps and attachments.
This feature provides peace of mind and creates an audit trail of your communications—helping resolve any questions about when documents were sent.
Troubleshooting Email Issues
Even with a perfect setup, email issues can sometimes occur. Here are solutions to the most common problems:
Common Email Problems
Emails not sending:
- Verify internet connectivity.
- Check that your email address and password are correct.
- Ensure your email provider isn’t blocking QuickBooks access.
Authentication errors:
- For Gmail users, enable “Less secure app access” or set up an app password.
- Check if two-factor authentication is causing issues.
- Update your password if it was recently changed.
Attachment problems:
- Make sure attachments don’t exceed size limits (typically 10MB).
- Verify the file format is supported.
Gmail isn’t connecting:
If you’re having trouble connecting Gmail, try these steps:
- Go to your Google Account settings.
- Navigate to Security > Less secure app access (or create an App Password if using 2FA).
- Enable access temporarily while setting up QuickBooks.
After successful setup, you can restore your previous security settings.
Spend a Few; Save a Bunch
Setting up email in QuickBooks may seem like a small task, but it truly transforms your financial communication.
By following the steps outlined above, you can successfully send documents directly from your accounting software—saving you countless hours in the future, and allowing you to focus on growing your business rather than wrestling with administrative tasks.
For more advice on running a productive, secure business with QuickBooks, subscribe to our blog.
